A Guide to Campervan Lithium Upgrades
That first night off-grid usually tells the truth about your setup. The lights are fine, the fridge starts cycling harder as the evening cools down, someone plugs in a mobile, and suddenly you are watching the battery monitor more than the sunset. A proper guide to campervan lithium upgrades matters because the right system gives you confidence to stay put, while the wrong one becomes an expensive guessing game.
Lithium has become the go-to upgrade for campervans because it solves a few common headaches at once. You get more usable capacity than AGM, faster charging, less weight and better voltage stability under load. That sounds straightforward, but the battery itself is only part of the job. In a campervan, charging gear, cable sizing, solar input, protection and how you actually travel all matter just as much.
Why campervan lithium upgrades are worth doing properly
The biggest reason people upgrade is usable power. With a traditional lead-acid setup, draining the battery too deeply shortens its life, so you only use part of the rated capacity if you want it to last. Lithium changes that equation. In practical terms, a 100Ah lithium battery can often deliver close to what travellers expect, instead of needing to baby it.
Weight is the next big win. In a campervan, every kilo counts, especially once you add water, food, recovery gear and camping gear. Dropping battery weight can make a real difference without sacrificing runtime. Faster charging is another major benefit. If you move camp regularly, a properly set up DC-DC charger and alternator-fed system can put meaningful charge back in far quicker than older battery types.
Still, not every van needs the biggest battery on the shelf. Some people mainly run lights, a fridge and a water pump for weekend trips. Others are working remotely with laptops, chargers, an inverter and long stays in one spot. The best upgrade is not the most expensive one. It is the one sized for how you actually use the van.
Start this guide to campervan lithium upgrades with your real power use
Before choosing a battery, work out what you want it to run and for how long. That sounds obvious, but it is where a lot of setups go wrong. People often buy capacity based on a rough guess, then either overspend or end up short.
A compressor fridge is usually the main constant load, but not always the biggest overall user. Add in lighting, fans, water pumps, device charging, diesel heater controls, coffee machines, induction gear or a 240V inverter and the numbers can climb quickly. Usage also changes with the season. In summer, fridges run harder and fans stay on longer. In winter, heating systems may become the priority.
As a rough rule, a simple touring van might be comfortable with 100Ah to 150Ah of lithium. A van with heavier inverter use, longer off-grid stops or remote work requirements may need 200Ah or more. There is no one-size-fits-all figure. The point is to size from the loads upward, not from whatever battery happens to be on special.
Battery size is only half the story
Capacity matters, but charge recovery matters too. If your battery is large but your charging system is undersized, you can still end up behind every day. That is common in vans that rely on short drives between camps or spend time parked under trees where solar performance drops away.
A balanced system is usually the sweet spot. That means battery storage, solar input and vehicle charging all support each other. If one part is weak, the whole setup feels weaker than it should.
Charging matters more than most people expect
A lithium battery will only perform well if it is charged correctly. In campervans, that usually means looking closely at alternator charging, solar charging and sometimes 240V charging as well.
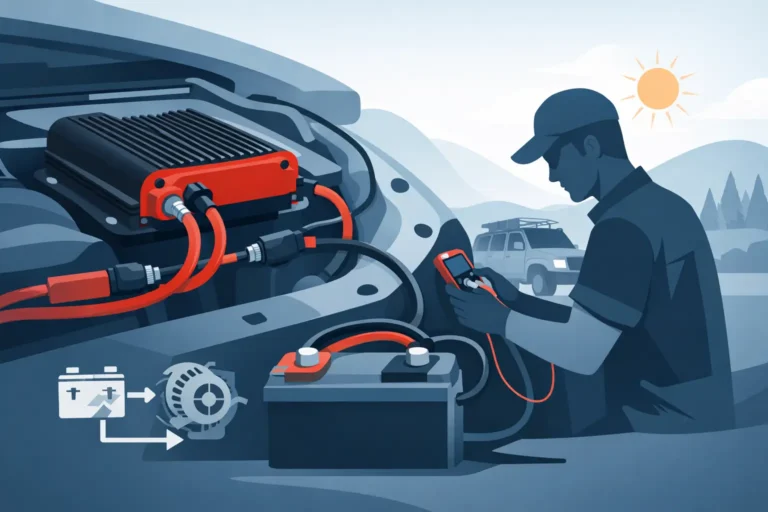
For many modern vehicles, a DC-DC charger is the right approach between the starter battery and the house battery. It helps manage charging properly, especially where smart alternators are involved. Relying on a simple voltage-sensitive relay in a lithium setup can work in some older vehicles, but it is often not the best long-term solution.
Solar is what gives most campervan owners proper independence. Even a modest solar array can keep a fridge and basic loads happy if the weather cooperates. The catch is that panel size, regulator quality, shading and roof space all affect real-world results. A van with one partially shaded panel parked in the wrong spot can perform very differently from the same van in full sun.
If you spend time in powered sites before heading bush, a quality 240V charger that suits lithium chemistry is worth having. It gives you a reliable way to leave fully charged and helps keep the system healthy.
The wiring and protection side of a lithium upgrade
This is the part people do not see once the trim goes back in, but it is where quality shows. A battery upgrade is not just swapping one box for another. Cable size, fuse protection, isolators, busbars, earth points and mounting all need to suit the system.
Lithium batteries can deliver current very differently from AGM, so weak points in an older setup can become obvious once the new battery is installed. Undersized cable can lead to voltage drop, poor charging performance and unnecessary heat. Poor terminations and badly planned protection can create reliability issues you only discover when you are a long way from town.
A proper install also needs to consider battery management systems, low-temperature charging limits where relevant, inverter surge loads and how everything is accessed for servicing later. Clean layout matters. So does making sure components are mounted securely enough for corrugations, heat and years of vibration.
Can you keep your existing gear?
Sometimes yes, sometimes no. That depends on what is already in the van.
If your solar regulator or mains charger has a proper lithium profile, it may stay. If your DC-DC charger is compatible and correctly sized, same story. But older gear is often where upgrade budgets blow out. People plan around battery cost, then find the charger, regulator or cabling also needs attention.
This is not a reason to avoid the job. It is just better to know early. A lithium battery fitted into a charging system that was never designed for it will not deliver the results most owners expect.
Picking components that suit the way you travel
There are plenty of good brands in the market, but matching parts is more important than chasing a logo. Battery quality matters, especially with internal battery management systems, cell quality and local support. The same goes for chargers, monitors and inverters.
For some vans, a simple and tidy system is the best outcome – one quality lithium battery, a correctly matched DC-DC charger, solar regulator and battery monitor. For others, especially those with larger inverters or longer stays off-grid, the setup may need more storage, better solar coverage and a more detailed power management layout.
This is where tailored advice matters. A retired couple touring for months have different needs from a weekend surfer van or a family running multiple devices every day. The best setups are built around habits, not assumptions.
Common mistakes in a guide to campervan lithium upgrades
The most common mistake is underestimating total load. The second is overestimating charging. People often assume solar ratings on paper will be available all day, every day. They will not. Shade, weather, roof layout and season all change the result.
Another common issue is keeping old wiring that was marginal even before the upgrade. Then there is inverter creep – fitting a larger inverter because it seems handy, without accounting for the battery bank and charging required to support it. A toaster, coffee machine or induction cooktop can flatten a modest setup surprisingly fast.
Battery monitoring is another area worth getting right. A basic voltage reading is not enough to understand lithium properly under load. A decent monitor gives you a clearer picture of what is coming in, what is going out and how long you can realistically stay put.
When a professional install makes sense
There is a difference between fitting parts and building a dependable touring setup. If your van is simple and you know your electrical systems well, some upgrades are manageable. But many campervan owners are better served by getting the design checked before spending money.
That is especially true if the van has an existing dual battery system, solar, an inverter, 240V charging or signs of previous electrical modifications. Fault-finding old wiring can take longer than installing new gear, and it is often where practical workshop experience pays off.
For campervan owners around the Sunshine Coast and hinterland, working with a technician who understands both automotive electrical systems and off-grid power is useful because the vehicle side and the living side of the van are connected more than people think. Coastal Cool Air sees that crossover regularly, and it is often the difference between a tidy upgrade and one that keeps coming back with little issues.
A good lithium upgrade should feel boring in the best possible way. The fridge stays cold, the lights stay on, the batteries charge as expected and you stop thinking about power every evening. That is usually the sign the system was planned properly from the start.